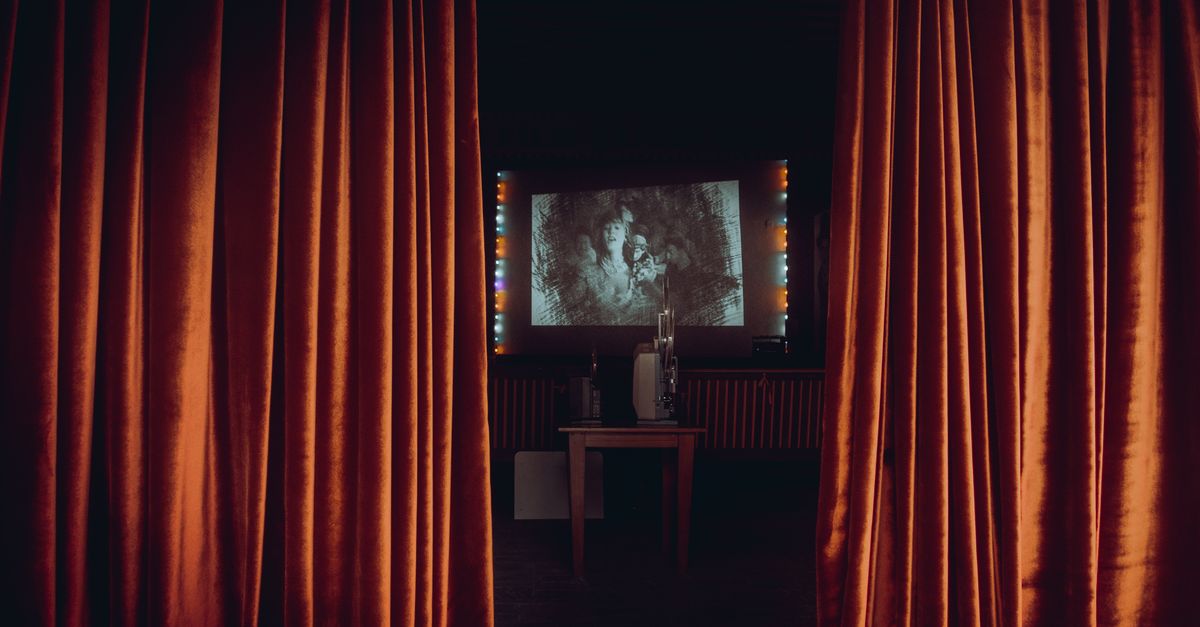
Why Your New Home Projector Disappoints (And What Actually Works for a True Cinematic Experience)
You just unboxed your shiny new home projector. The advertising promised a giant, immersive screen, cinematic colors, and a theater-like experience in your living room. You set it up, powered it on, and… it’s just not quite there, is it? The picture looks washed out, especially with any ambient light. Dark scenes are muddy. The ‘giant screen’ feels more like a slightly larger, less vibrant TV. You might be blaming the projector itself, thinking you got a dud or should have spent more. But in my experience, the projector is often only half the equation. The real disappointment comes from overlooking several crucial, non-obvious factors that collectively define a truly cinematic home projector setup.
Most people, myself included in my early days, make the mistake of focusing almost entirely on the projector’s specs: lumens, resolution, contrast ratio. While these are important, they’re only one piece of the puzzle. A high-end projector can still deliver a terrible experience if the environment and supporting components aren’t up to par. I’ve personally seen a moderately priced projector, meticulously set up, outperform a far more expensive one thrown into a suboptimal room. The secret isn’t just about the projector; it’s about the ecosystem you create around it. It’s about understanding how light behaves, the physics of projection surfaces, and the often-ignored subtleties that elevate a ‘big picture’ to a ‘big experience‘.
Key Takeaways
- Ambient light is the single greatest enemy of projector image quality, often more impactful than projector brightness itself.
- The screen choice is paramount; investing in an ambient light rejecting (ALR) or acoustically transparent screen can dramatically improve picture and sound.
- Strategic room preparation, including dark paint and light absorption, is critical for maximizing perceived contrast and black levels.
- Proper calibration and placement, not just specs, unlock your projector’s true potential for color accuracy and sharpness.
Ambient Light is the Ultimate Image Killer, Not Just Projector Brightness
When I first got into home theater, I was obsessed with lumens. More lumens, I thought, meant a brighter, punchier image, capable of fighting off any stray light. I bought a projector with a respectable 3,000 lumens, thinking I could watch it in my living room with the blinds open. What a mistake that was. Even with the advertised brightness, the image looked flat, pale, and completely washed out. The ‘blacks’ were grey, and colors had no pop.
What I learned through painful trial and error is that ambient light pollution is far more detrimental to perceived contrast and color saturation than a projector’s raw lumen count can overcome. Think of it this way: your projector is adding light to a surface, but if that surface is already being hit by sunlight from a window, or even indirect light reflecting off a light-colored wall, your projector’s carefully crafted blacks are simply obliterated. The human eye perceives contrast relative to the brightest and darkest parts of an image. If your ‘darkest’ is already being raised by external light, your perceived contrast plummets, regardless of how bright the peak whites are.
What actually works: Instead of solely chasing higher lumens, prioritize light control in your viewing environment. Heavy, opaque blackout curtains or blinds are non-negotiable for any serious projector setup. And I mean opaque. Sunlight bleeding through thin blinds will still significantly degrade your image. Beyond windows, consider any other light sources: overhead lights, lamps, even the glow from other devices. For my dedicated home theater, I went as far as painting the walls a dark, matte grey and even the ceiling a very dark charcoal. This isn’t just aesthetic; it’s functional. Dark, non-reflective surfaces absorb stray light from the projector, preventing it from washing out the darker areas of the image. The difference this made, even with the same projector, was night and day. Black levels deepened, colors became richer, and the overall image had a three-dimensionality it lacked before. Don’t underestimate the power of a truly dark room – it’s often more impactful than an extra thousand lumens.
Your Screen is More Critical Than the Projector Itself
Many first-time projector owners, in an effort to save money or simply because they don’t know any better, project directly onto a white wall. Or, they buy the cheapest white pull-down screen they can find. This is perhaps the second biggest mistake I see, severely limiting the potential of even a good projector. A plain white wall or cheap screen is just a canvas; it doesn’t actively help your image.
What actually works: Investing in the right projection screen is a game-changer, especially if you can’t achieve a completely dark room or if you want maximum impact. There are two main types of screens that revolutionized my own setup:
- Ambient Light Rejecting (ALR) Screens: These screens are engineered with microscopic optical layers that reflect light coming from the projector back to the viewer while absorbing light coming from other angles (like overhead lights or side windows). For rooms with some uncontrollable ambient light, an ALR screen is indispensable. I put an ALR screen in my living room, and it dramatically improved image quality during the day, making the picture vibrant and maintaining much better black levels than a standard white screen. It literally looks like a giant TV, even with indirect daylight.
- Acoustically Transparent (AT) Screens: If you’re building a dedicated home theater and want to hide your speakers behind the screen (just like in a commercial cinema), an AT screen is essential. These screens have tiny perforations or a woven material that allows sound to pass through with minimal attenuation. The benefit? Your center channel speaker, which handles most dialogue, is positioned perfectly in the middle of the screen, creating a truly immersive audio-visual experience where voices genuinely come from the actors’ mouths. When I switched to an AT screen with speakers behind it, the soundstage instantly became more cohesive and realistic.
Choosing the right screen material, gain, and even color (some ALR screens are grey or black) is paramount. Don’t cheap out here. A quality screen will make a mediocre projector look good, and a good projector look phenomenal. It’s a component that actively enhances what your projector is trying to do, rather than passively reflecting it.
Room Preparation: Beyond Just Blackout Curtains
After tackling ambient light and upgrading my screen, I still felt like my black levels weren’t as deep as they could be, and contrast wasn’t as dynamic as I saw in demo rooms. I realized the remaining culprit was light reflection within the room itself. Even with blackout curtains, light from the projector was bouncing off my light-colored ceiling, side walls, and even the furniture, re-entering the projected image and diluting the dark areas.
What actually works: This is where dedicated room preparation comes in. Think of your room as a giant light trap. The goal is to absorb as much stray light as possible. Here’s what made a significant difference for me:
- Dark, Matte Paint: As mentioned, I painted my dedicated theater room walls and ceiling a very dark, matte grey (think ‘battleship grey’ or even charcoal). Matte finishes are crucial because they scatter light rather than reflecting it directly. Glossy or semi-gloss paints will create hot spots and secondary reflections that wash out your image. This single change dramatically improved perceived black levels and color richness, making the image pop in a way it never did on light walls.
- Light-Absorbing Furnishings: Replace light-colored furniture, especially anything directly facing the screen, with darker, matte fabrics. Even a light-colored rug can reflect projector light. Consider dark velvet drapes on side walls (if not painted dark) to further absorb light. I even put dark fabric over light-colored media console surfaces to prevent reflections onto the screen.
- Ceiling Treatment: This is often overlooked. Your ceiling is a huge reflective surface. Painting it dark, or even installing dark acoustic panels, will stop projector light from bouncing down and washing out your image. The impact on perceived contrast is immense.
These seemingly minor details add up to a monumental difference. You are creating a controlled environment where the only light your eyes perceive is the light coming directly from the projector and reflected off the screen. This allows your projector to truly showcase its contrast capabilities and deliver those inky blacks and vibrant colors you’re craving.
Calibration and Placement: Unlocking True Performance
Many projector owners just plug and play, maybe adjust brightness and contrast a little, and call it a day. This is like buying a high-performance sports car and only ever driving it in first gear. Out-of-the-box settings are almost never optimal, and improper placement can introduce significant image flaws.
What actually works: Proper calibration and meticulous placement are essential for maximizing your projector’s potential. This goes beyond simple picture settings:
- Precise Placement: The projector needs to be perfectly centered horizontally with your screen. Any horizontal offset will require using keystone correction, which digitally distorts the image to make it rectangular. While convenient, keystone correction inevitably softens the image and can introduce artifacts because it’s manipulating individual pixels. Mount your projector directly in line with the screen, at the correct height to minimize or eliminate vertical keystone.
- Throw Distance and Zoom: Consult your projector’s manual or an online throw distance calculator (like those from Projector Central) to determine the ideal placement for your screen size. Avoid using the maximum or minimum zoom settings, as lenses often perform best in the middle of their zoom range, yielding a sharper image. Take the time to fine-tune the focus until individual pixels are sharp and clear across the entire screen.
- Basic Calibration: While professional calibration is ideal, you can achieve significant improvements yourself. Start by downloading free calibration patterns (like those from AVS Forum or from your projector’s test patterns). Adjust brightness (black level) so that you can see subtle detail in the darkest parts of the image without blacks looking grey. Adjust contrast (white level) so that bright details are visible without crushing whites. Then, fine-tune color saturation and hue. Many projectors also have preset picture modes (e.g., ‘Cinema,’ ‘Movie,’ ‘Reference’). These are almost always more color-accurate than ‘Vivid’ or ‘Dynamic’ modes, which often boost brightness and color to unrealistic levels. Start with a ‘Cinema’ or ‘Movie’ mode and adjust from there. The difference this makes to realistic skin tones, natural landscapes, and overall visual comfort is substantial.
In my experience, even a modestly priced projector, when meticulously placed and calibrated, can deliver a far more satisfying and accurate image than a much more expensive one that’s just randomly thrown up. It’s about squeezing every last drop of performance out of the hardware you have.
Audio Integration: The Often-Ignored Half of Immersion
It’s a home theater, not just a home picture. Yet, many people focus intensely on the visual and then rely on the projector’s tiny, built-in speaker or a single soundbar. While modern soundbars can be good, they fundamentally limit the immersive experience that a true home theater system provides.
What actually works: To achieve a genuinely cinematic experience, you need proper audio. This means a dedicated surround sound system.
- Separate Components: Forget the built-in speaker. Invest in an AV receiver and separate speakers. A minimum 3.1 setup (left, center, right front speakers, and a subwoofer) is a massive upgrade. The center channel, especially, is crucial for clear dialogue. When the sound comes from the screen, it roots the audio to the visual, making the experience far more engaging. Upgrade to a 5.1 or 7.1 system with rear surrounds for true immersion. Having sounds come from behind you completely changes how you perceive action sequences, ambient effects, and even musical scores. I started with a soundbar and thought it was good, but the moment I set up my first 5.1 system, I realized how much I was missing – the sense of being in the movie, not just watching it.
- Speaker Placement: Just like projector placement, speaker placement is critical. Follow recommended guidelines for distance and angle for each speaker (front, center, surround, subwoofer). Many AV receivers come with calibration microphones (like Audyssey or AccuEQ) that automatically measure your room and adjust speaker levels, distances, and equalization. Don’t skip this. It optimizes the sound for your specific room and seating position.
- Acoustic Treatment (Advanced): For the truly dedicated, consider basic acoustic treatment. Sound reflections off hard surfaces (walls, ceilings, floors) can muddle dialogue and blur sound effects. Adding a few strategically placed acoustic panels or bass traps can tighten up bass, clarify dialogue, and create a much more precise and enveloping soundstage. While an advanced step, even simple additions like thick rugs and heavy curtains can help reduce reverberation.
Ignoring audio is like enjoying a gourmet meal with a stuffy nose. You’re missing a huge part of the intended experience. The synergy between a stunning visual and compelling, enveloping audio is what transforms watching a movie into an event.
The Overlooked Power of Image Processing and Source Quality
Even with a great projector, screen, and room, your image can still look less-than-stellar if the source material or the projector’s internal processing isn’t optimal. Many assume their streaming box or Blu-ray player is sending the best signal, but there are often hidden bottlenecks.
What actually works: Pay attention to what your projector is actually being fed and how it’s handling that signal:
- High-Quality Source Material: This might seem obvious, but it’s worth reiterating. Streaming services offer varying bitrates and resolutions. A 4K movie streamed at a low bitrate will look worse than a 1080p Blu-ray played directly from disc, especially on a large screen. Invest in 4K Blu-rays for critical viewing. Ensure your streaming device is set to output the correct resolution and refresh rate (e.g., 4K HDR at 24 frames per second for movies).
- Proper HDMI Cables: For 4K HDR signals, you need high-speed HDMI cables rated for HDMI 2.0 or 2.1, especially for longer runs. Cheap or old cables can introduce signal degradation, leading to flickering, dropouts, or simply a lower quality image. I once spent hours troubleshooting a washed-out HDR signal only to find a cheap, generic HDMI cable was the culprit.
- Projector’s Internal Processing: Many modern projectors have advanced image processing engines. Explore settings like motion interpolation (often called ‘smooth motion’ or ‘frame interpolation’), noise reduction, and sharpness enhancements. While motion interpolation can make movies look like soap operas (a huge pet peeve of mine), some projectors do an excellent job with subtle noise reduction without softening the image. Experiment carefully. High-quality projectors also upscale lower-resolution content more effectively, making 1080p Blu-rays look surprisingly good on a 4K projector.
- HDR Tone Mapping: HDR (High Dynamic Range) is a game-changer for projectors, but only if handled correctly. Projectors, by their nature, can’t achieve the peak brightness of an OLED TV. Good projectors have sophisticated tone mapping algorithms that intelligently compress the HDR signal to fit the projector’s capabilities, preserving detail in bright highlights and dark shadows. Poor tone mapping can lead to crushed blacks or blown-out whites. Look for projectors with robust HDR implementation and consider external tone mapping solutions (like an HD Fury Vertex) for truly optimal results if your projector struggles.
Don’t let these technical details scare you off. The key is understanding that your projector is part of a chain, and the weakest link in that chain will define your ultimate viewing experience. By addressing these factors, you move from a disappointing ‘big picture’ to a breathtaking cinematic journey.
Frequently Asked Questions
## Q: Can I use a projector in a room with a lot of windows?
A: Yes, but it will require significant investment in light control and an Ambient Light Rejecting (ALR) screen. Without blackout curtains or blinds that completely block light, and an ALR screen designed to reject off-axis light, the image will likely appear washed out and dull, regardless of the projector’s brightness. A truly dark room is always preferred for optimal contrast and color.
## Q: Do I really need a dedicated projection screen, or is a white wall good enough?
A: While a white wall can work in a pinch, a dedicated projection screen is almost always a significant upgrade. Screens are engineered for uniform light reflection, proper gain (how reflective they are), and specific viewing angles. More importantly, specialized screens like Ambient Light Rejecting (ALR) or acoustically transparent (AT) screens offer performance benefits (like combatting ambient light or hiding speakers) that a plain wall cannot.
## Q: What’s the most important projector spec for image quality?
A: Many people focus on lumens (brightness) or resolution (4K vs. 1080p). However, contrast ratio is arguably the most crucial spec for a truly cinematic image. High contrast provides deep blacks, bright whites, and excellent perceived depth and detail. A projector with great contrast in a dark room will almost always look more impressive than an ultra-bright projector with poor contrast in a brightly lit room. Resolution also matters, but often less than excellent contrast, especially at typical viewing distances.
## Q: Is professional calibration necessary for a home projector?
A: While not strictly necessary for everyone, professional calibration can unlock the absolute best image quality your projector is capable of. Out-of-the-box settings are rarely optimized for color accuracy, black levels, and white levels. However, you can make significant improvements yourself by using free test patterns and carefully adjusting basic settings like brightness, contrast, color, and tint. Starting with a ‘Cinema’ or ‘Movie’ preset is often a good baseline.
## Q: Should I buy a smart projector with built-in streaming apps?
A: While convenient, I find the ‘smart’ features of projectors are often secondary and can quickly become outdated. Projector manufacturers aren’t typically software companies, and their app interfaces can be clunky or slow compared to dedicated streaming devices like an Apple TV, Roku, or Nvidia Shield. Investing in a high-quality external streaming device and connecting it to your projector via HDMI usually provides a much smoother, faster, and more up-to-date user experience, allowing your projector to focus on what it does best: projecting a great image.
In conclusion, if your new home projector isn’t delivering the cinematic punch you expected, don’t automatically blame the hardware. The truly immersive home theater experience is built on a foundation of thoughtful environmental control, strategic component choices, and meticulous setup. By focusing on light management, investing in a quality screen, preparing your room to absorb stray light, precisely calibrating your projector, and integrating compelling audio, you’ll transform your viewing space from ‘just a big picture’ into a genuine, breathtaking cinematic escape. These are the lessons I learned the hard way, but they’re the ones that ultimately unlocked the magic of projection for me.
Written by Elias Vance
Hardware reviews, product teardowns, engineering insights
A former R&D engineer, Elias possesses an uncanny ability to dissect new hardware and explain its inner workings.
You Might Also Like
Why Your Car Stereo Has No Bass (And What Actually Works for Deep, Punchy Sound)
Frustrated by weak car audio bass? Discover why your factory or aftermarket system lacks punch and the real solutions for deep, impactful low end.

Why Your Home Humidifier Feels Gimmicky (And What Actually Works for Real Comfort)
Stop buying into humidifier hype. Learn why most models disappoint and the practical, often overlooked strategies for genuine indoor humidity control.
Why Your New Phone's Battery Still Dies Too Fast (And How to Actually Fix It)
Discover the non-obvious reasons your new smartphone's battery drains quickly and learn practical, actionable fixes beyond common advice.